Often it seems like there's nothing new in the world of wargaming, but I've never been satisfied with the 'standard' ways of basing ships for miniature wargaming, and so came up with my own method; I've never seen this done anywhere else, but if it has I'd love to know about it.
The old way of basing ships is to glue them to rectangles of card and build up a textured sea surface with filler, painted in an approximation of water. This tends to stick out like a sore thumb if the sea surface doesn't match your painting exactly, and even when it does the opaque filler is a bit unconvincing.
The newer way is to glue the model to a clear base of some sort, but the flat surface looks very artificial and especially for smaller ships a thick base can be nearly as tall as the model itself.
I think I've found a third way, that gives the textured benefits of filler while keeping everything clear. By way of giving back for the hundreds of tutorials I've read over the years, here's how I base ships.
Materials Needed
To base your ships like me, you will need the following:
- A ship model
- A suitably sized clear base - acrylic is likely the best option
- Glue to attach the two - I use superglue
- Artist's heavy gloss gel - I use this brand, but as long as it's thick and clear you're good
- White paint
- Gloss varnish
You'll need an old brush of roughly #2 size or larger to apply the gel, and a finer brush to apply the white paint on the wave tops.
The first thing to stress is that, while I will using custom engraved acrylic bases for this tutorial, they're not strictly necessary. I first started this using the same commercially available bases that the incredible
JJ's Wargames uses - clear acrylic 'stadium' bases from
Fluid 3d Workshop.
Method
Step Zero
Before you get around to basing, you'll need to paint your ship and (preferably) varnish it. I'm not going to get into how to go about that, but one tip I do have is that a drop of superglue on top of a Vallejo-style dropper bottle makes an excellent holder for smaller scale ships.
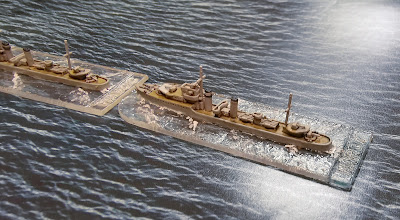
I'll be basing some 1/1800 H class Destroyers - the models are 3d prints from
Thousand World Miniatures on eBay, but while the models are nice I can't really recommend them because of the poor service. Instead I've ordered the rest of my ships from
Blitzkreig Miniatures.
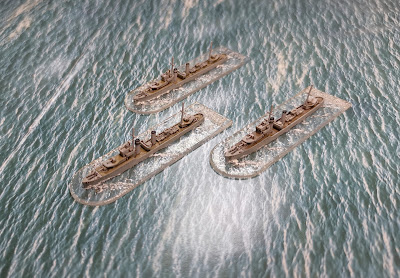
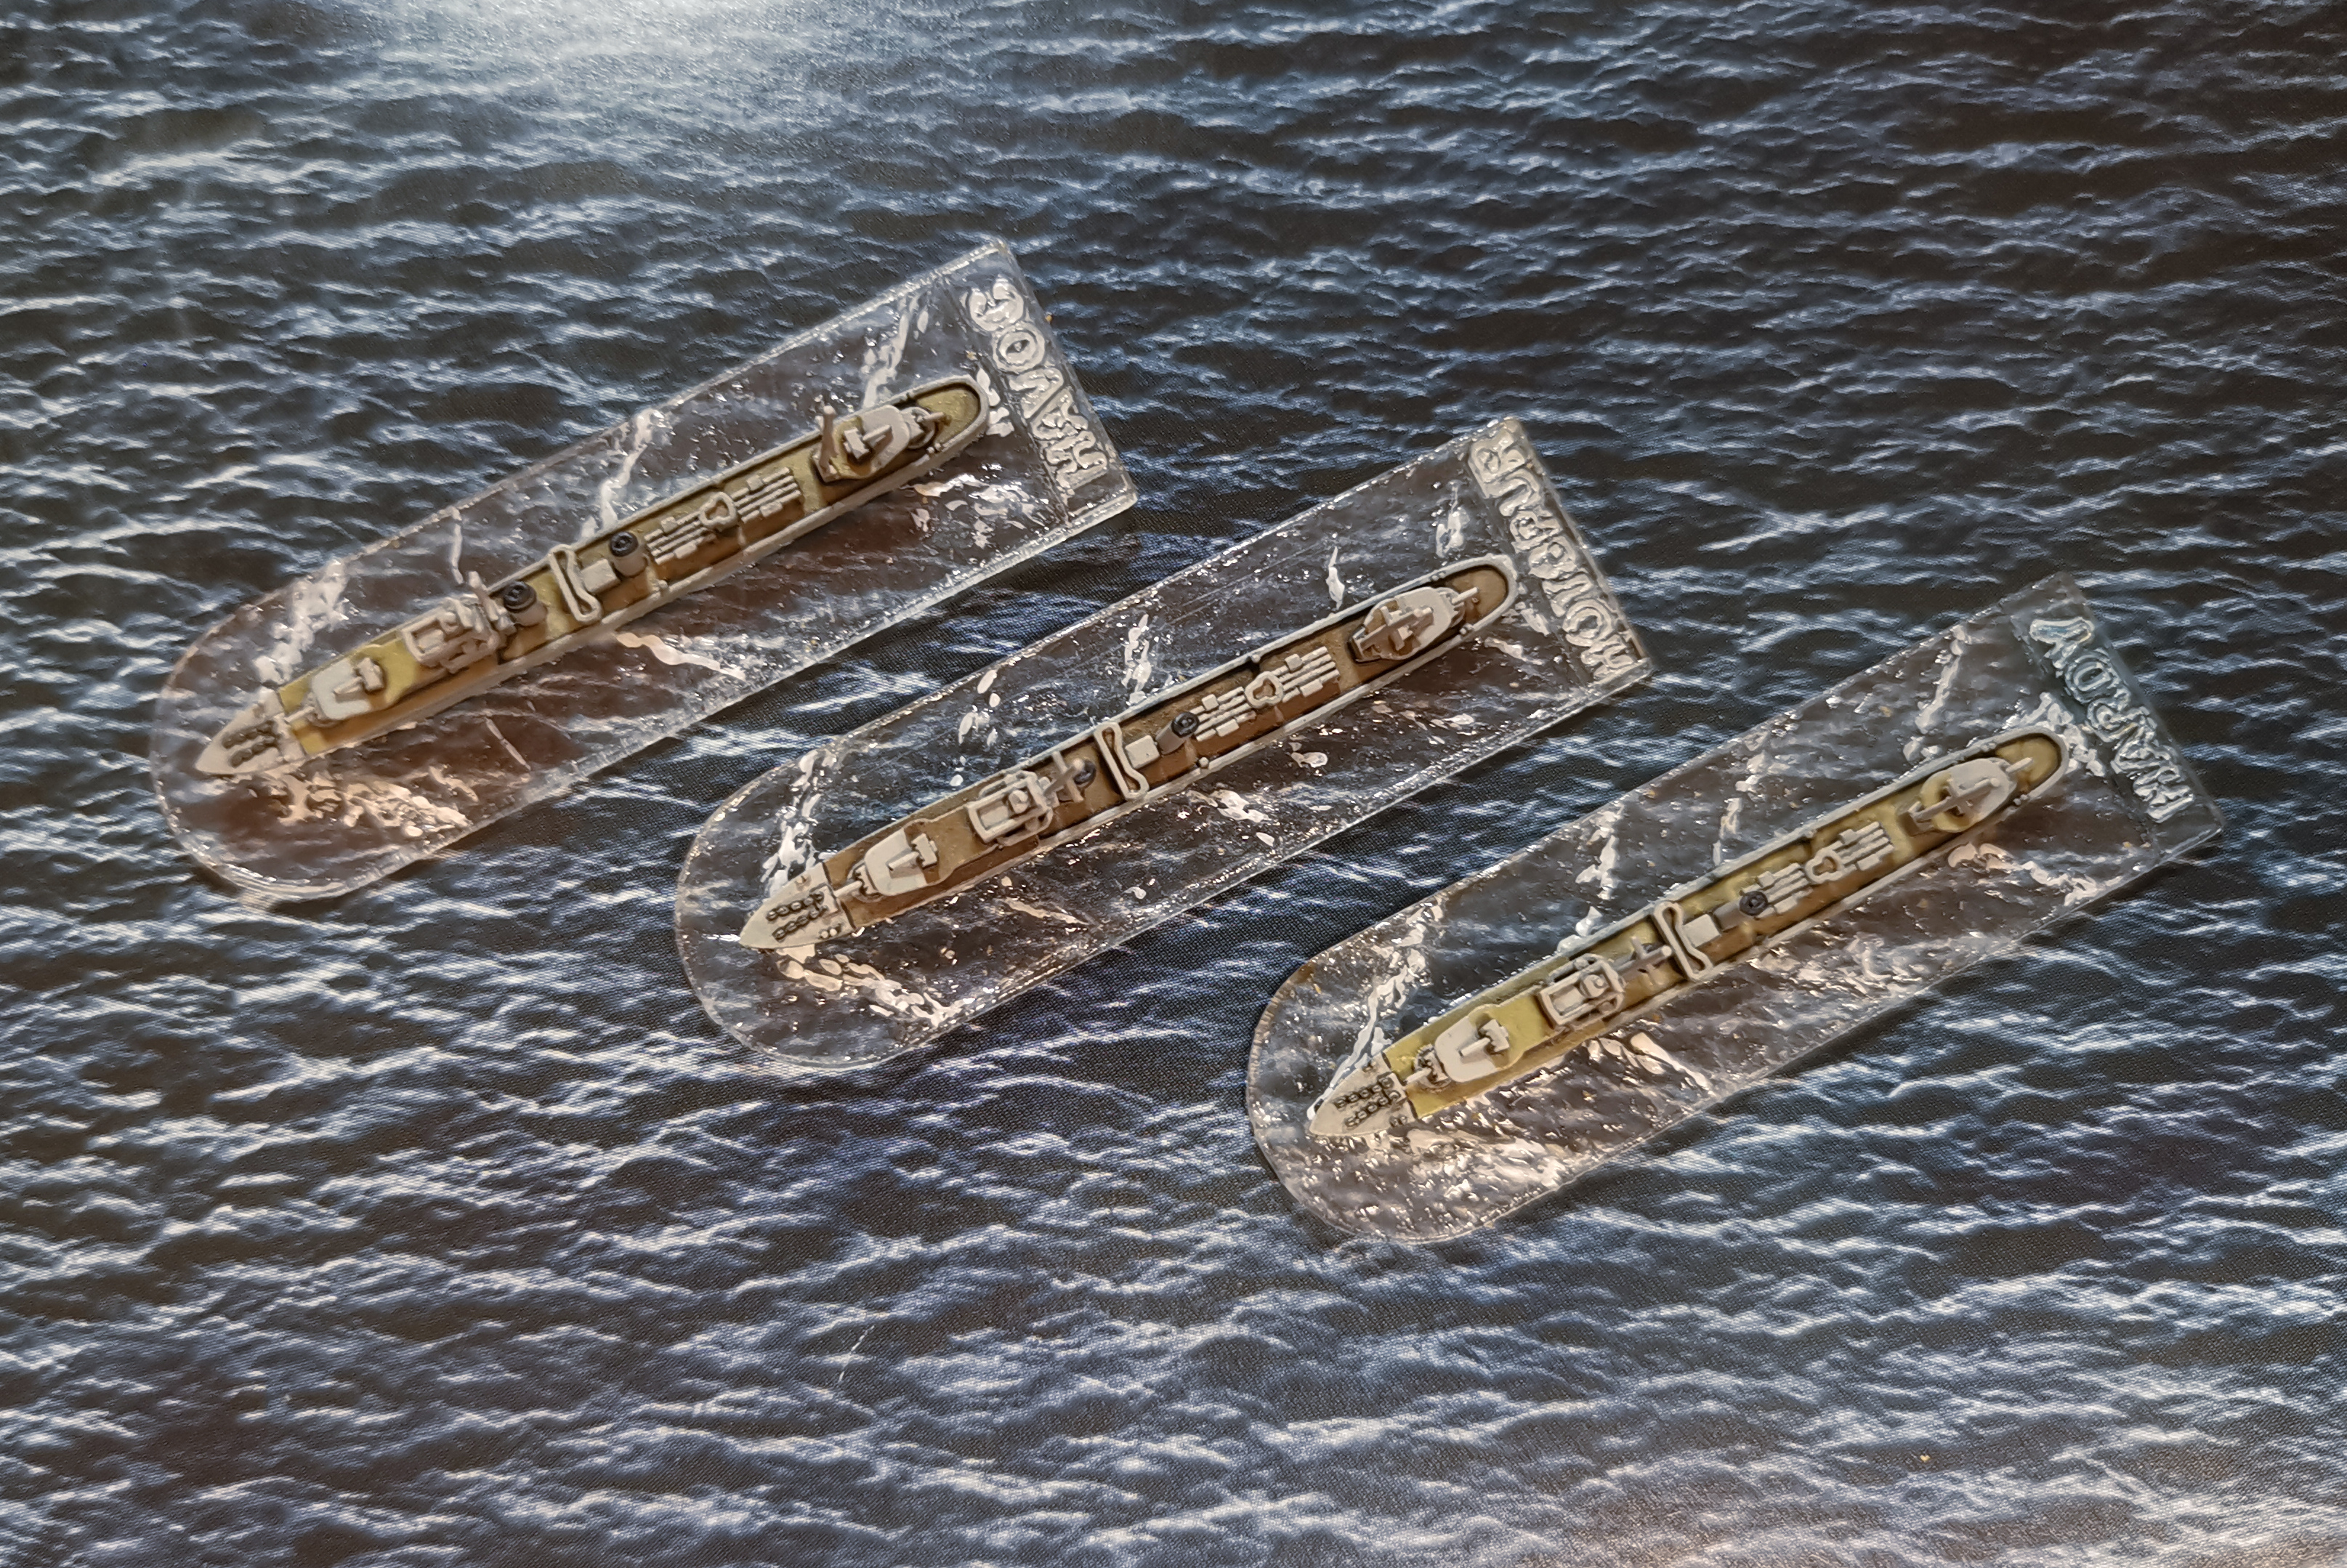
The bases I laser cut myself from 1mm acrylic, allowing me to engrave the ships' names on the rear of the base. They're 65mmx20mm.
While 2mm is fine for larger ships - like the Napoleonic brig above - for these tiny destroyers 1mm was a much less imposing choice.
Step One
The first step is to glue the ship onto the base. I use superglue for this, and I've yet to have a problem with the clear acrylic 'frosting' as a result. If your base has a protective film on it, you'll need to remove it from the top of the base before you begin, but you can leave any film on the bottom on throughout.
Step Two
Once the glue has dried, it's time to break out the acrylic medium and begin applying it to the flat surface of the base. What you're looking for here is both to fill any slight gap that there might be between the ship's hull and the base, and to completely cover the base with a thin layer of gel to break up the artificial flatness.
You're not looking to build up any waves yet, so stipple on a thin layer making sure to get it touching the hull, and let it dry
Step Three (and 3.1, 3.2, 3.3...)
Now you've coated the whole base, it's time to start building up the waves. How big you go depends on what sort of sea state you want to depict - my destroyers are intended for the battle of Narvik, which was fought in a fjord, so I want a relatively calm sea state. This will also depend on the scale of model!
Because these are destroyers, I want to represent them moving at speed, so I'm making sure to build up a decent bow wave.
One thing to beware of: it's very difficult to build up a convincing wave in one pass! If you do, you'll find that it looks lumpy in a way which really spoils the effect. Instead, try to build it up in layers, going back over the same place a few times and letting it dry in between. That way you'll keep the peaks of the gel small and sharp, instead of large and blobby. Despite the small sea state, these waves took me four passes to build up to a satisfactory level.
Step Four
Now the waves are all built up, a touch of white paint along the wave tops to add the 'white horses' really sells the illusion.
If your ships are propeller powered, you want to add the white froth in the wake where the props have churned up the water too.
Step Five
At this point, I flooded the engraved nameplate with white paint, and rubbed the excess off when dry.
Step Six
 |
| This shot in particular shows just how well the clear bases blend into the seascape |
The final step is to varnish the water - both to protect the paintwork, and to give a nice uniform glossy finish to everything.
 |
| From the cold North Sea... |
The benefit of this sort of basing is that it works equally well on a cold North Sea table as it does on a warm Mediterranean one (not that HMS Hotspur made it that far...)
 |
| ...To the warmth of the Mediterranean |
Hopefully you've found this tutorial useful. If you end up basing your ships in a similar manner, I'd love to hear about it - let me know in the comment below this post!


Comments
Post a Comment